 Home >
 Knowledge Base >
 FAQs >
 Downloads >
S700 and S300 Motion Tasking Example
This article explains how to setup a Motion Task in the S300 and the S700 servo drive. For PDF format, download: S700 and S300 Motion Tasking Example.
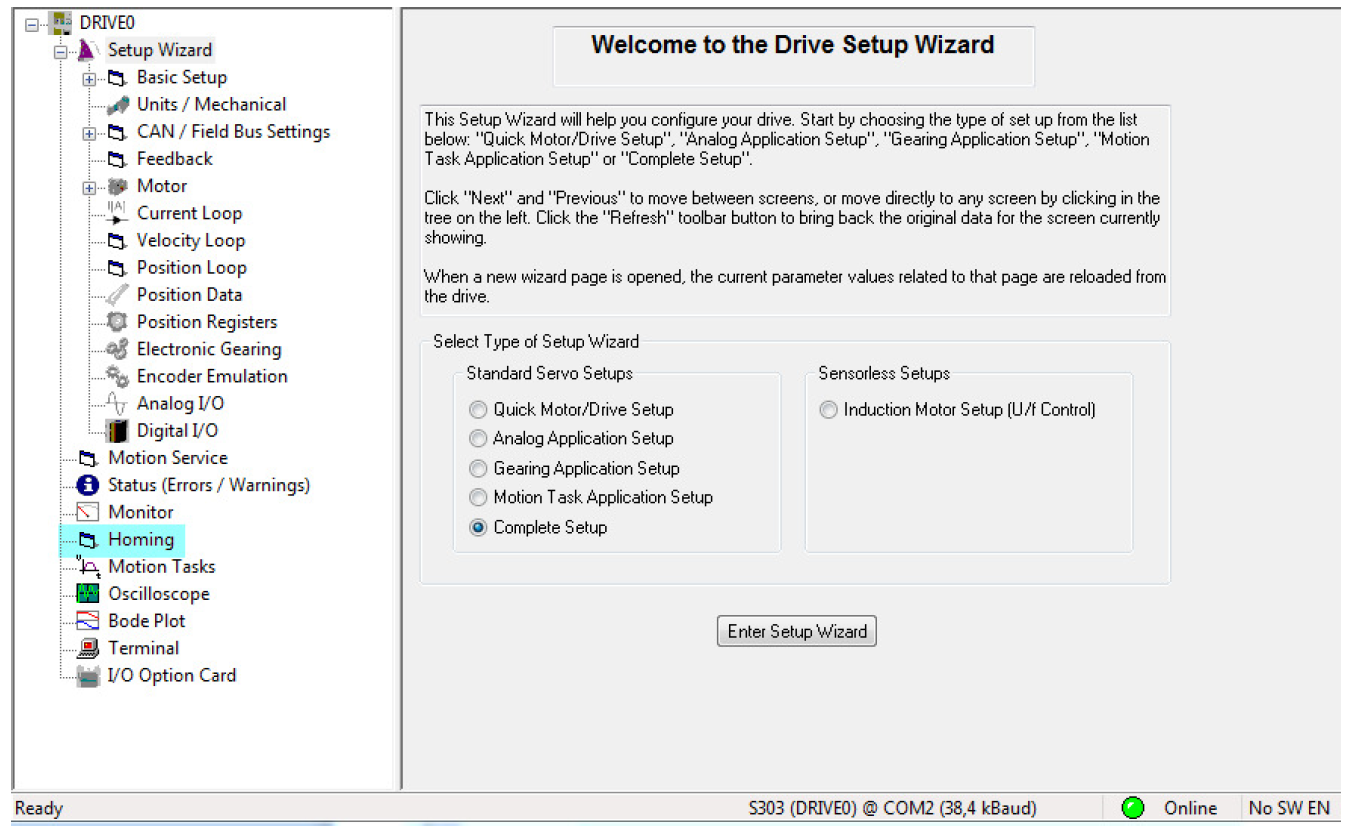
- Start the DriveGUI commissioning program
The first Window is:
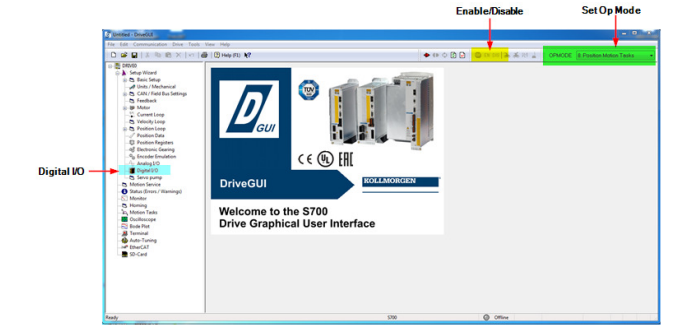
To get started:
- Disable the drive (if it is enabled ) using the DIS button on the top toolbar.
- Set the OPMODE to mode 8: Position Motion Tasks from the list box on the toolbar ( far right corner ).
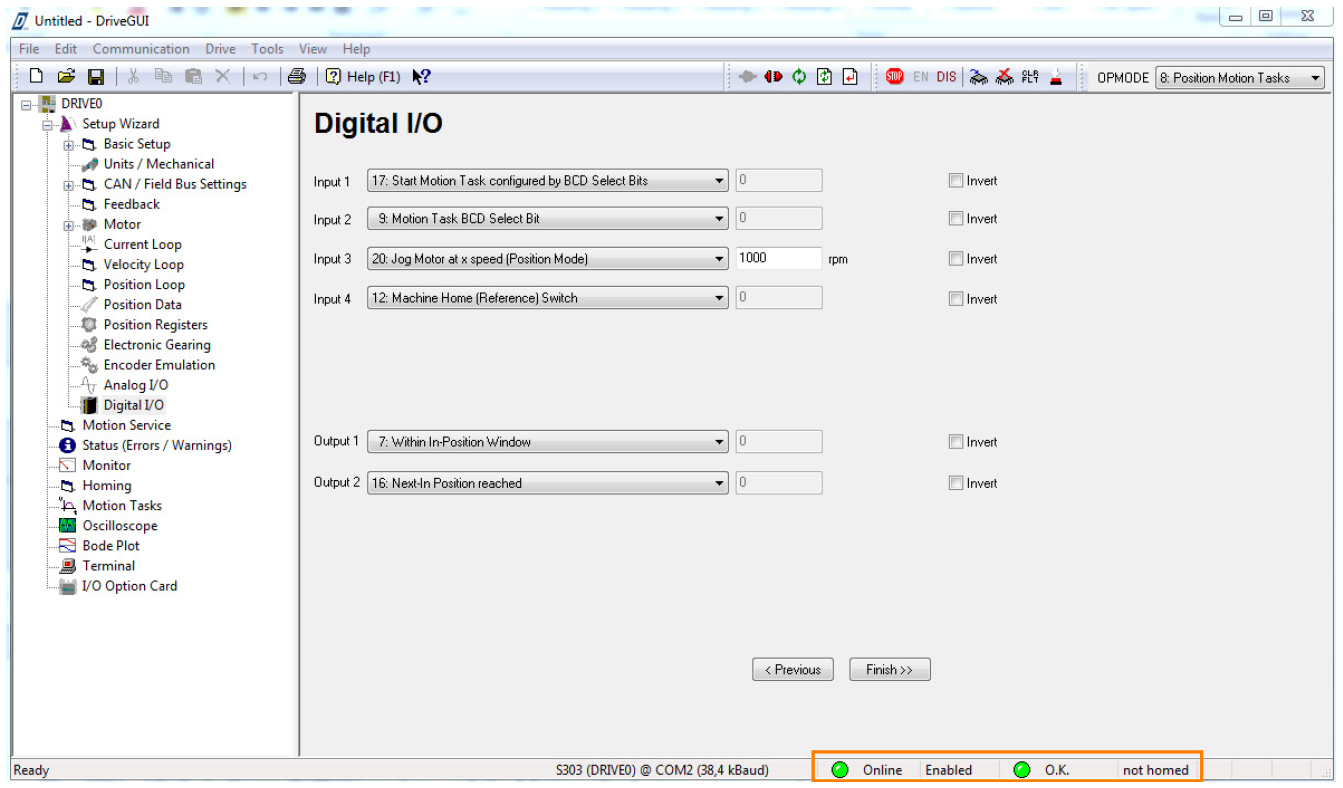
- Open the Digital I/O window by double-clicking on Digital I/O under the DRIVE and Setup Wizard ( left project tree ) and feed the program with the shown data below (Note: This is not required if commands are given from the serial port).
- Configure the Digital I/O as shown below.
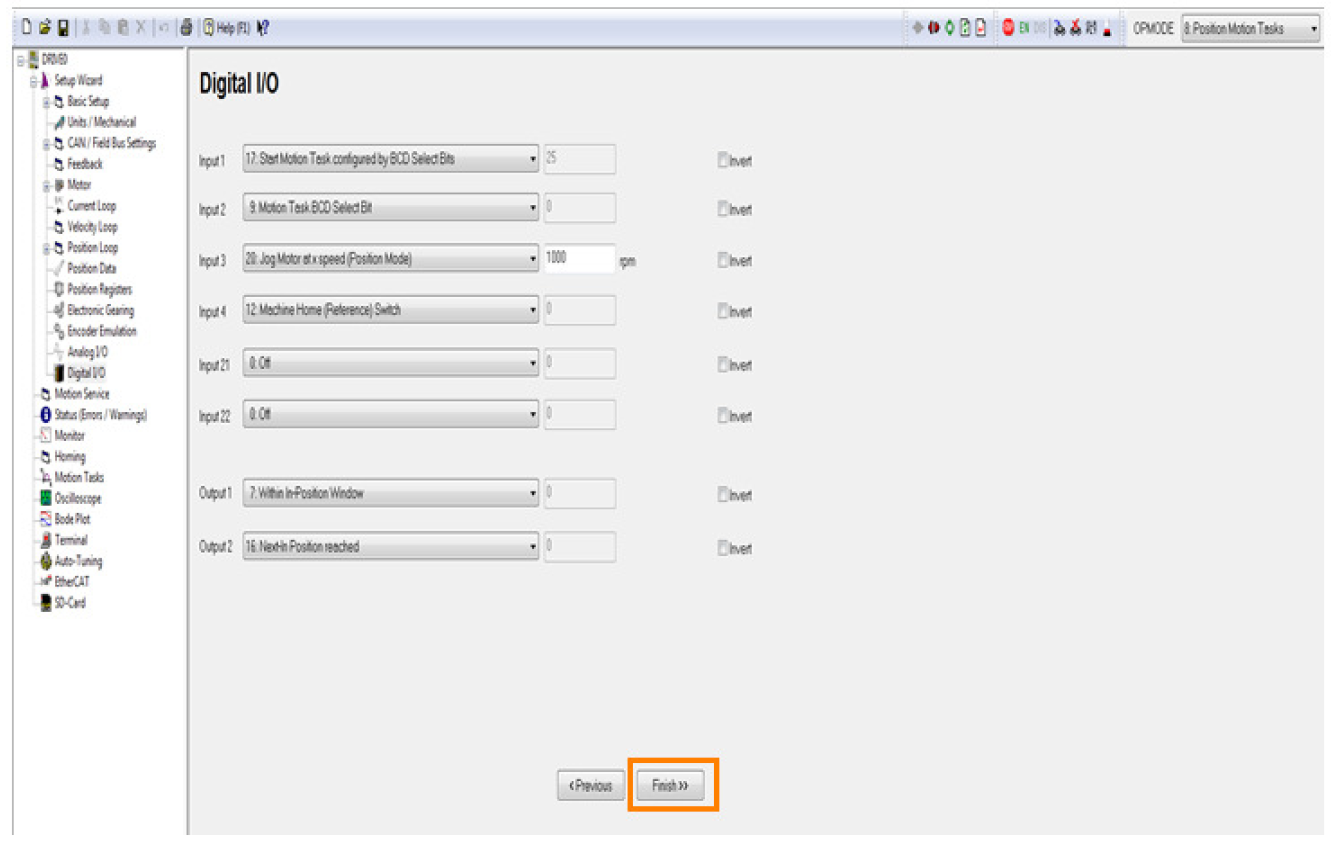
- Click on the “Finish” button.
- The following window will pop up.
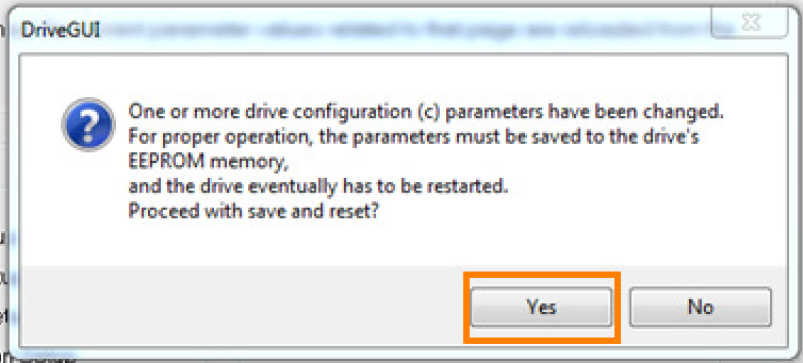
- Click on“Yes” Save to EEPROM & Reset Amplifier.
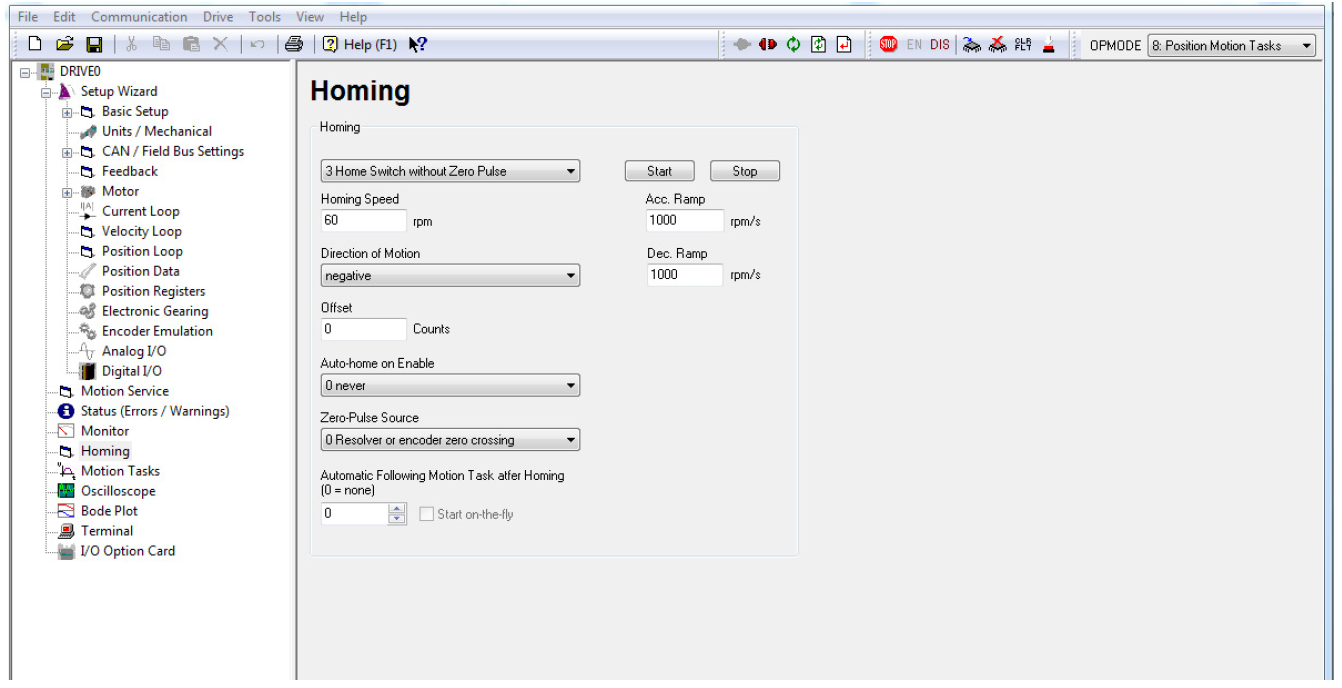
- Next double-click on “Homing” in the left project tree under the Drive->Setup Wizard as shown below.
- Configure the Homing Screen as shown below. Since Digital Input 4 was setup to be the home reference switch, mode 3: Home Switch without Zero Pulse was chosen for this example.
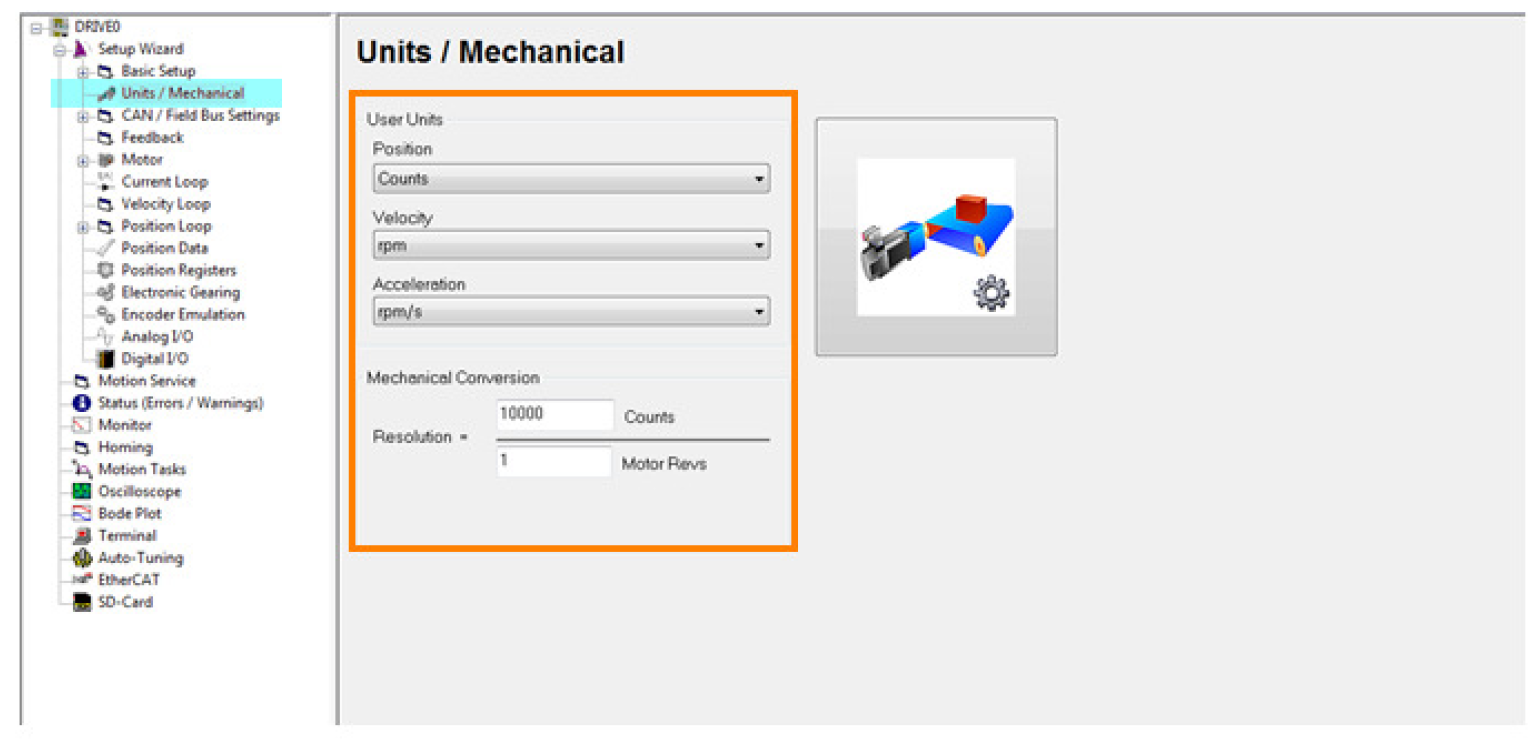
- Double-click on “Units/Mechanical” under the Drive->Setup Wizard project tree on the left which will show the current user units and mechanical conversion. This is application dependent but for this demonstration
the following is assumed:
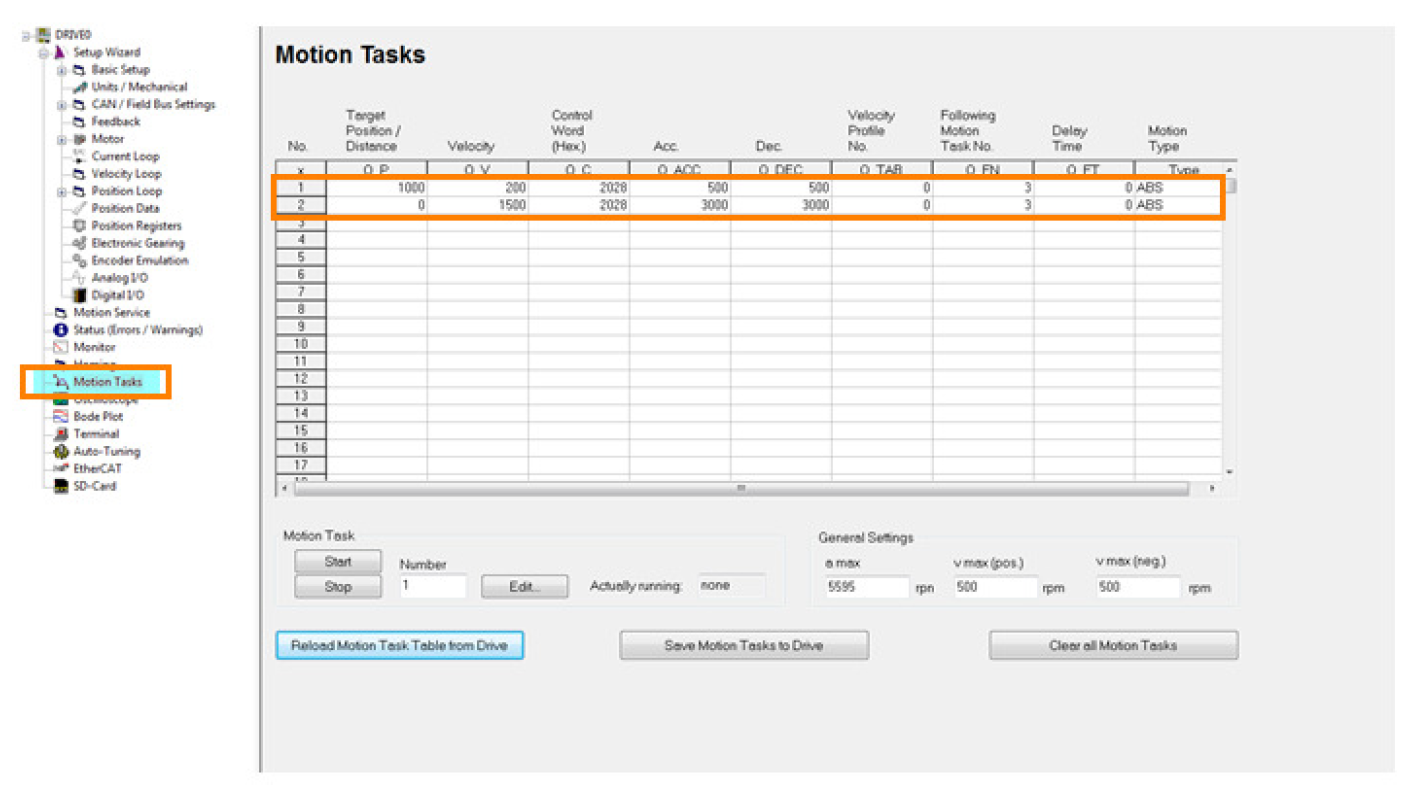
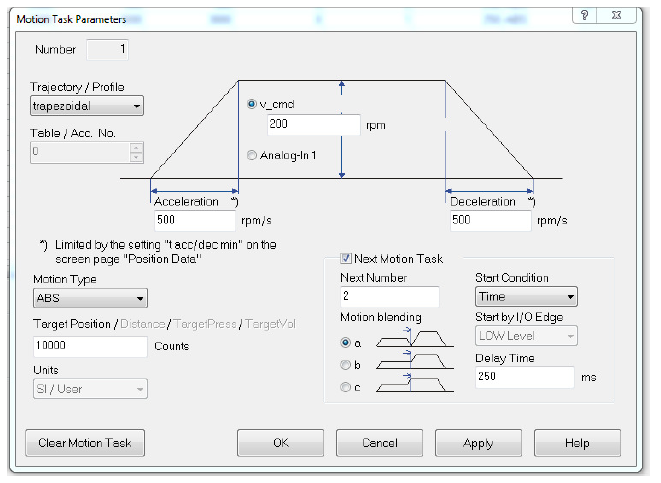
- Double-click on “Motion Task” under the project tree to call up the Motion Task window. Note for this example Motion Tasks 1 and 2 were configured. The following procedure will show how to configure these.
- Disable the drive (if it is enabled )
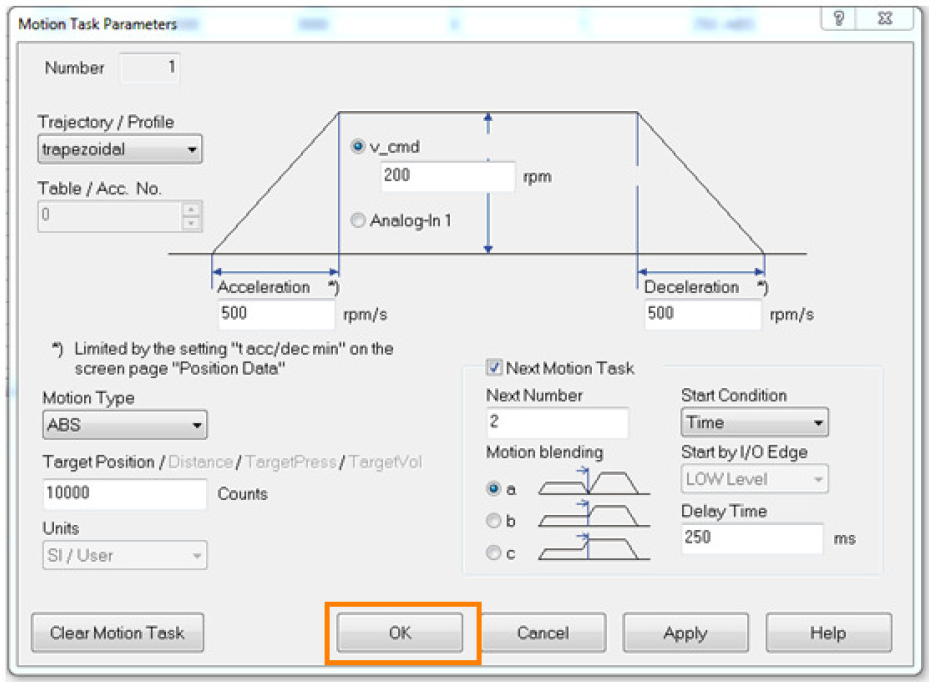
- To configure Motion Task 1, click on the first row of the Motion Task table to highlight and then double-click that row to call up the “Motion Task Parameters”.

- Use the shown values and then click on the “OK” button.
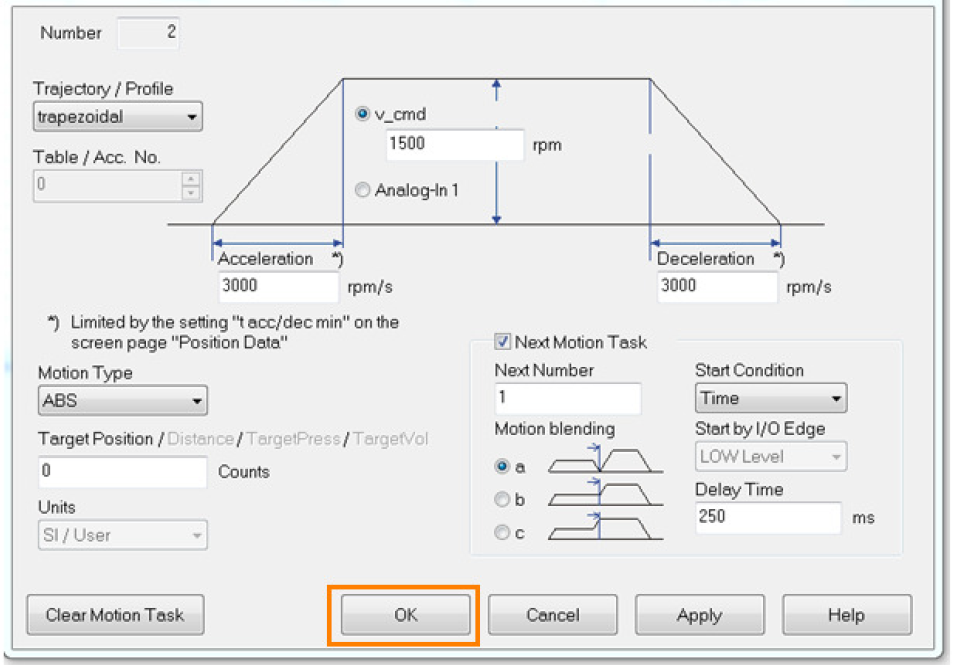
- Repeat the process to set the Motion Task Parameters for motion task number 2. Set the values as shown and then click on the “OK” button.
- Now that the 2 motion tasks have been configured. Click on the “Save Motion Tasks To Drive” button.
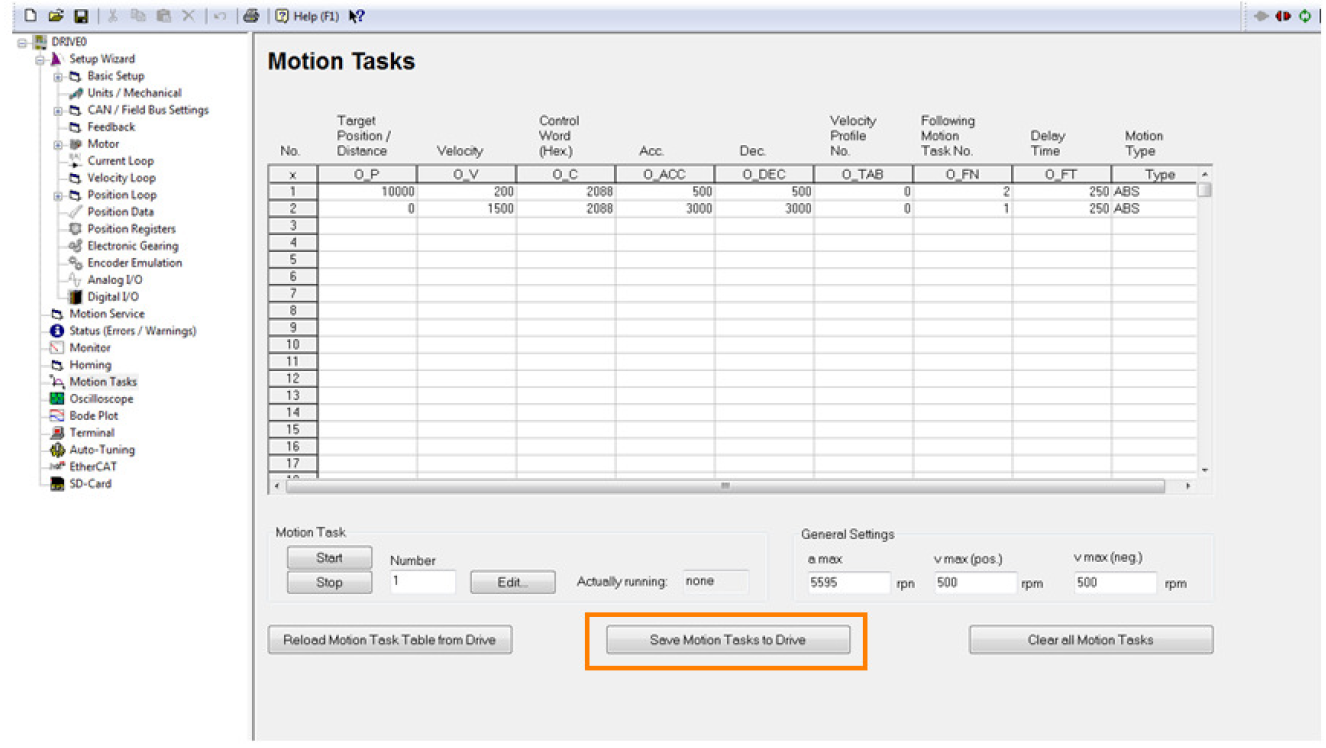
- To permanently save the data to the EEPROM and reset the drive use the “Save To EEPROM” button and then the “Reset” button on the top toolbar in the DriveGUI.

- Set the digital I/O’s to low level and enable the drive (hardware and software). Assuming everything is healthy, the bottom toolbar should show the current status:
- Online
- Enabled
- OK
- Not Homed
- Control the drive by the digital IO. The following chart summarizes the states of each function.
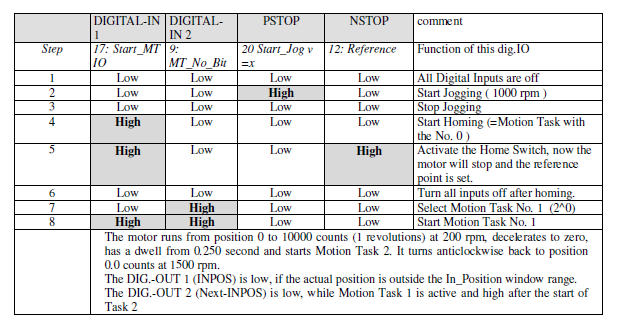
To demonstrate, there are 8 steps beginning with jogging, then homing, and finally executing the motion
tasks.
- Operating the S700 in Serial Positioning from serial commands
- MH (serial command to start homing)
- Motion task higher than 200 can be changed without rebooting by coldstarting the drive information is saved in the RAM, below 201 are saved in the Eprom.
- Move is the serial command that starts a move from the motion task table. Example ( Move 1) Starts
- Motion Task no. 1
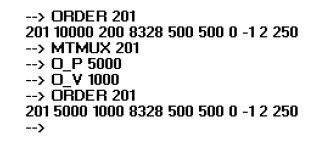
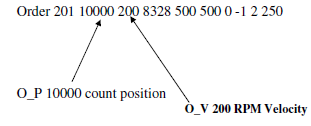
- What is an Order?
- An Order is the serial command for the Motion Task . The Order below has the same information as in the Motion Task table below.
- ORDER 1 10000 200 8328 500 500 -1 2 250
- ORDER 1 10000 200 8328 500 500 -1 2 250
- Motion task 201 and higher are saved in the RAM and can be changed on the fly without rebooting.
Commands:
MTMUX The MTMUX command defines the motion task that is being changed with the commands
O_P The O_P command is used to define the target position for motion task
O_V The O_V command defines the target speed for motion task
O_C The O_C command defines the type of motion task, Example ( Absolute Move
O_ACC The command O_ACC can be used to define the acceleration ramp for motion task
O_DEC The command O_DEC can be used to define the deceleration ramp for motion task
O_FT The command O_FT is used to delay the start of the next motion task. (Units ms)
O_FN The command O_FN is used to define the motion task to follow the current motion block
Refer to ASCII Object Reference for more parameter details
This is an example of how to modify a RAM type motion task parameter value:
This example was done in the Terminal screen of the DriveGUI